

WooCommerce is by far and away the most popular free ecommerce solution for WordPress. Here’s a comprehensive tutorial to setting up WooCommerce that investigates each and every one of the plugin’s nooks and crannies.
With over 1+ million active installs, a 4.5 user rating
on WordPress.org, and an army of happy, loyal digital store owners to
back it, WooCommerce is the most popular free e-commerce solution for
WordPress by a mile. If you’re looking to open up virtual shop on your
WP-powered website, going with WooCommerce is one of the best decisions
you could make.
Here’s an extensive guide to setting up WooCommerce on your blog.
Your first task after activating WooCommerce is to also install WooCommerce pages, as prompted by the new notification message sitting on the top of your dashboard.

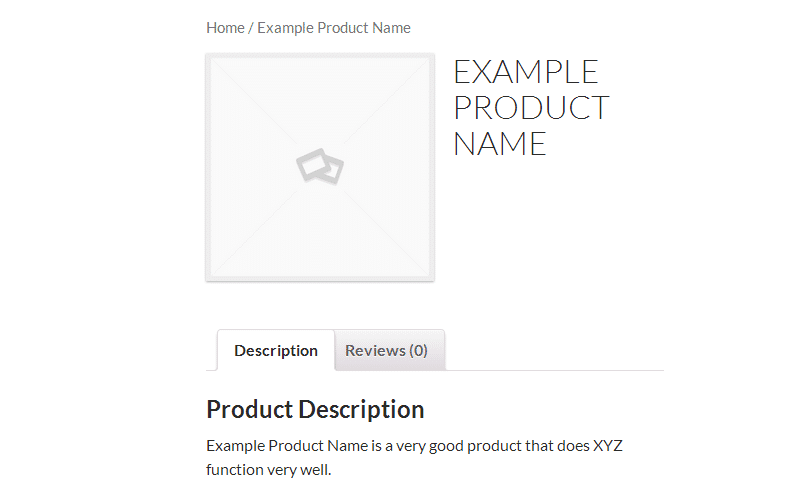
Create a title and short description for the product. Here’s what just a title & description looks like in a live preview.
That done, scroll down below the post editor to reveal two new widgets on the post editing screen: product data and product short description.
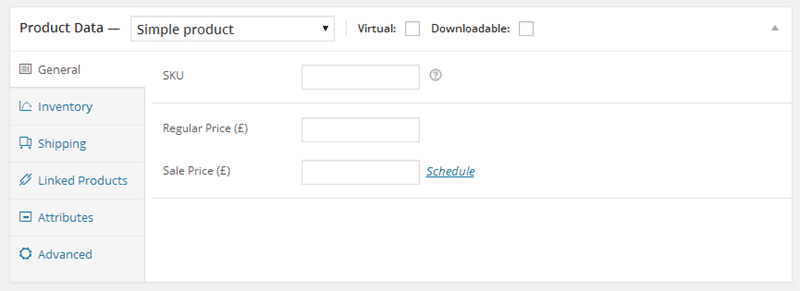
In the product data screen widget, you can select whether or not the product is virtual (the former option removes the Shipping data tab) and if it is digital. You can enter in an SKU (identification number) and the regular & sale price (sales can be time-sensitive) in the General tab.
If you’re selling digital products, then you also have to upload the file to be purchased, customize the download limit (leave it blank to mark it as unlimited), the download expiry (leave it blank to keep it available permanently), and the file type (standard/application/music). The file type you select affects the schema.org markup for the product.
Next, in the Inventory tab, you can customize options to manage your stock by entering in the quantity of the product, stock status (in/out of stock), and if you’d like to allow backorders. Additionally, you can mark the product as individually sold, meaning only one can be bought in a single order.
In the Linked Products tab, you can add upsells, cross-sells, and product grouping. Attributes allows you to enter in specific attributes of the product (e.g. reliable, never breaks down, etc.) that will be displayed under an Additional Information tab in the front end version of the product page. Finally, you can enter custom purchase notes, give the product a menu order, and enable/disable reviews in the Advanced tab.
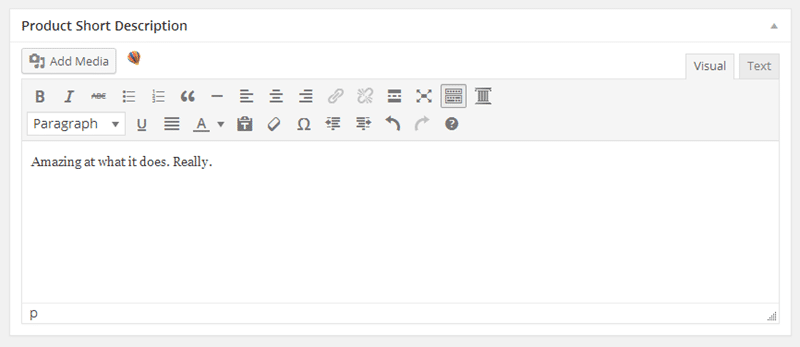
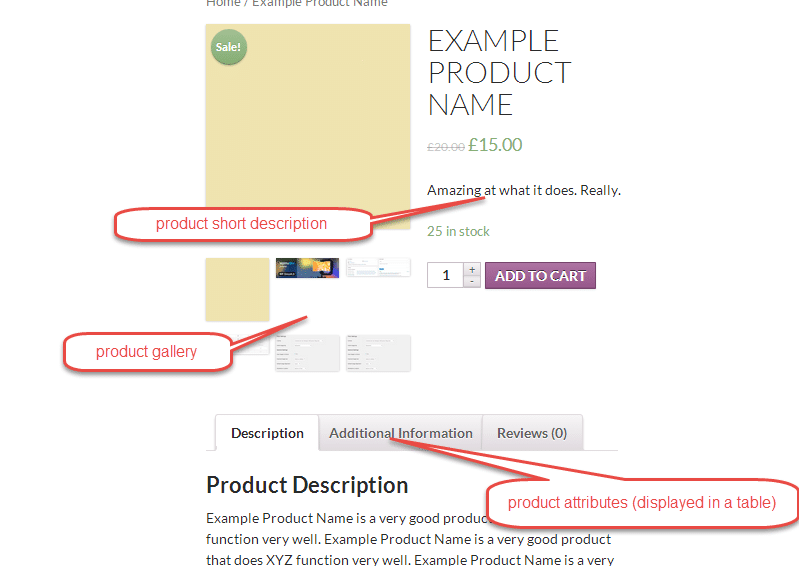
With the product short description screen widget, you can create a short tagline for the image that will be displayed under the product title.
After playing around with all of that, don’t forget to add tags, place it in a category, and include a product image/gallery. Here’s what some sample data looks like in a live preview.
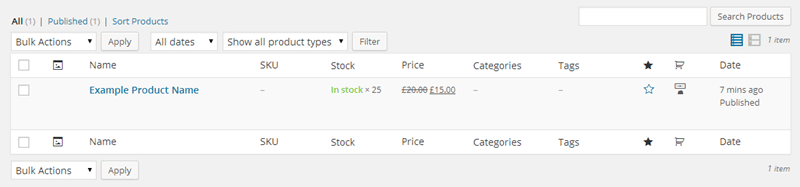
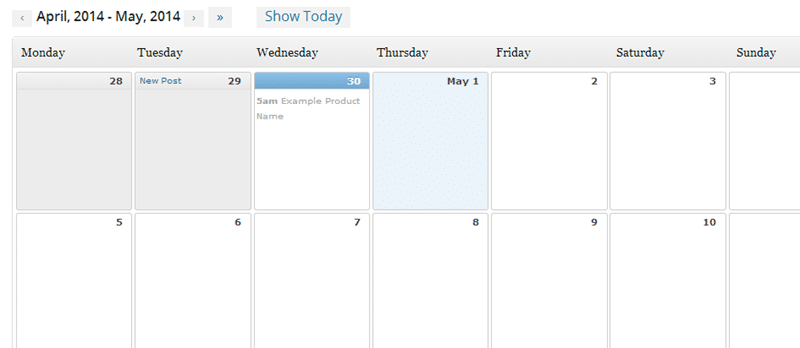
In the other pages under WP Admin > Products, you can view your products, categories, tags, shipping classes, attributes, and calendar. Each of these pages look like the standard WP Admin > Posts > Categories page, excepting the product view and calendar view (displayed below).
This page displays a list of your current purchases and orders. If you sell digital products, there’s not much to do here other than see who bought what. But if you sell physical goods, here’s where you can organize what products you need to ship and what orders are being processed or put on hold.

WooCommerce has several powerful options for adding new coupons to your e-store. In the coupon editing screen, the coupon data screen widget allows you to customize the coupon discount and restrictions.
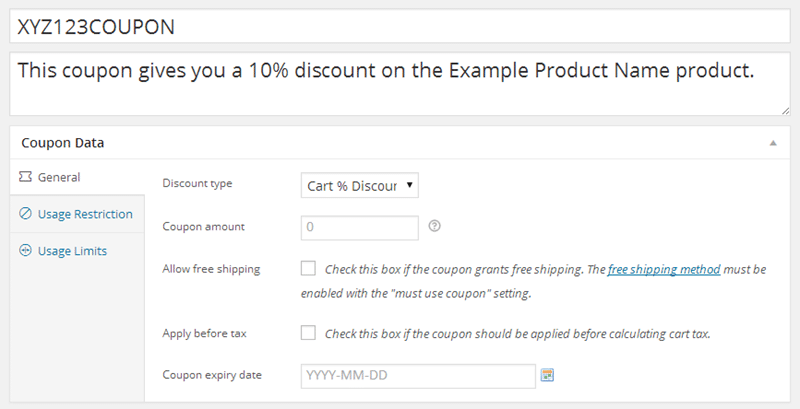
The General tab allows you to edit the basic coupon information: the type of coupon (cart discount, cart percentage discount, product discount, and product percentage discount), its value, free shipping options, coupon taxation, and its expiry date.
In Usage Restrictions you can set a minimum spend the customer has to make to validate the coupon. To restrict the use from use in conjunction with other coupons, check the box for Individual use only. If the coupon shouldn’t apply to items that are on sale, there’s an option for that, too. Here’s also where you select the products and product categories the coupon is applicable to. Lastly, you can even ban certain email addresses from coupon usage.
The final tab, Usage Limits, sets the usage limit per coupon or per customer.
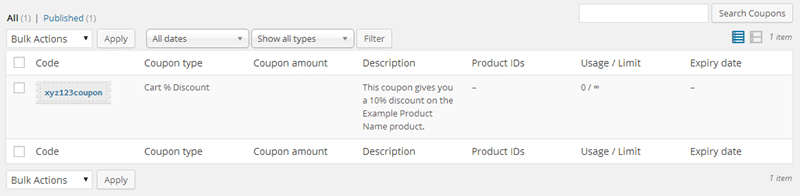
The coupon management screen is below.
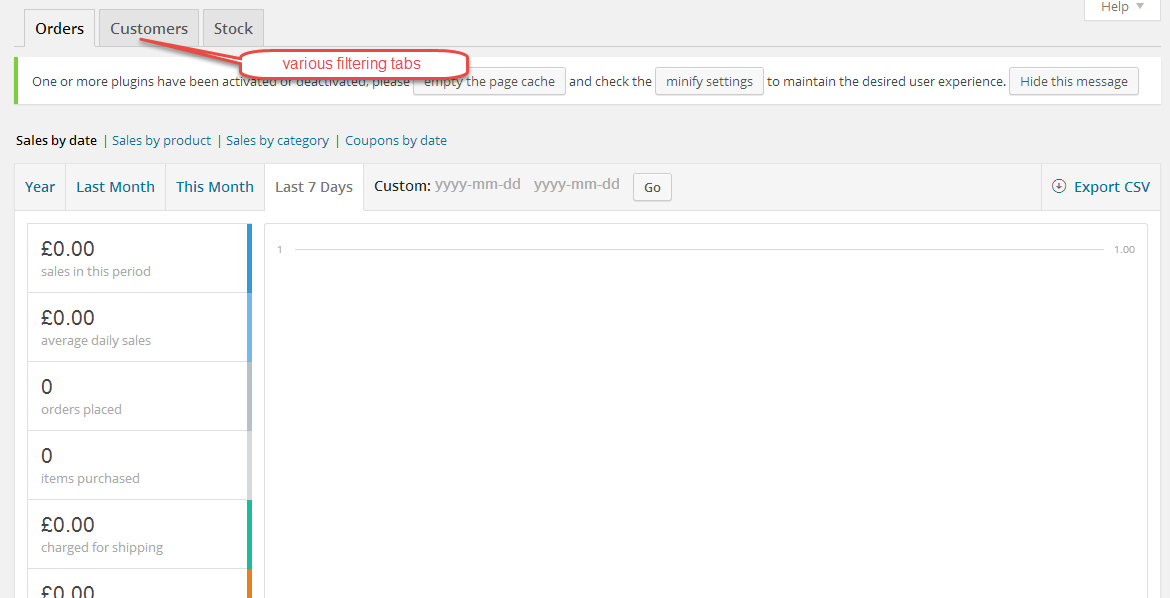
WooCommerce also offers powerful built-in tracking. You can view charts and graphs of your sales, orders, and shipping costs over five different time periods. Each graph can be limited to the sales of a particular product, product category, or coupon. In the Customers tab, you can view your customer acquisition over the same five time periods. Lastly, you can also view your low in stock, out of stock, and most stocked products in the Stocks tab. All this data can be exported in a CSV sheet.
Here’s where WooCommerce gets really impressive: in the Settings screen, you can customize pretty much every single aspect of your e-store. Everything from your thousands separator to the check out process to email options can be tailored to your satisfaction.
The General tab takes care of your basic information, including your currency, base & selling locations, and display options.

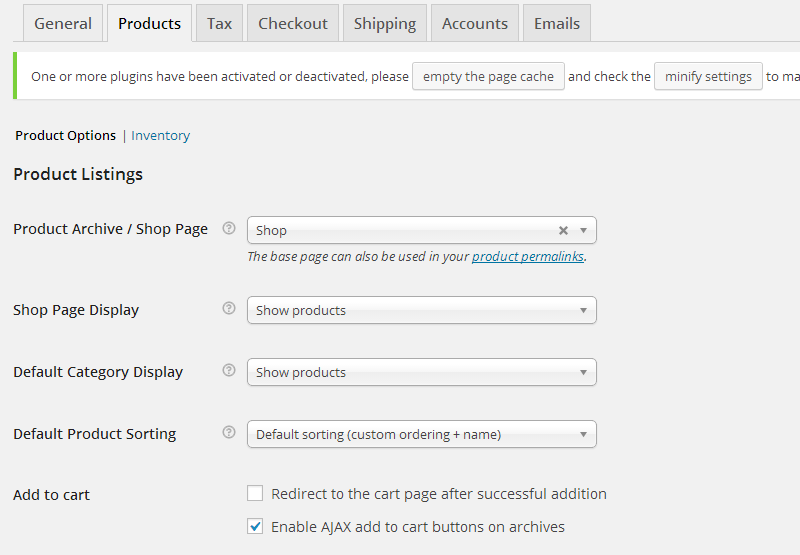
Your product data, including custom sorting, default displays, measuring systems, product thumbnail dimensions, download methods, and even Ajax/non-Ajax add to cart buttons is customized in the Products tab.
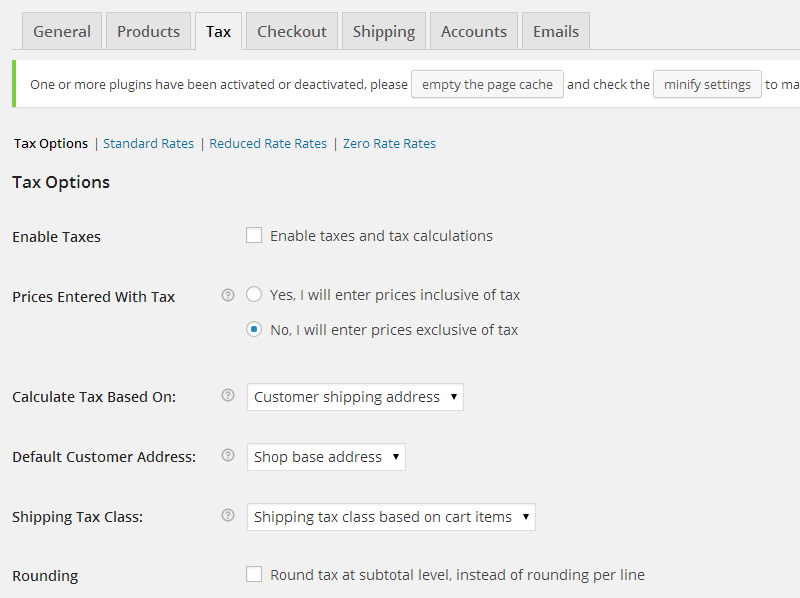
Taxation methods are modeled in the Taxes tab — if you wish, you can even disable taxation in your store.
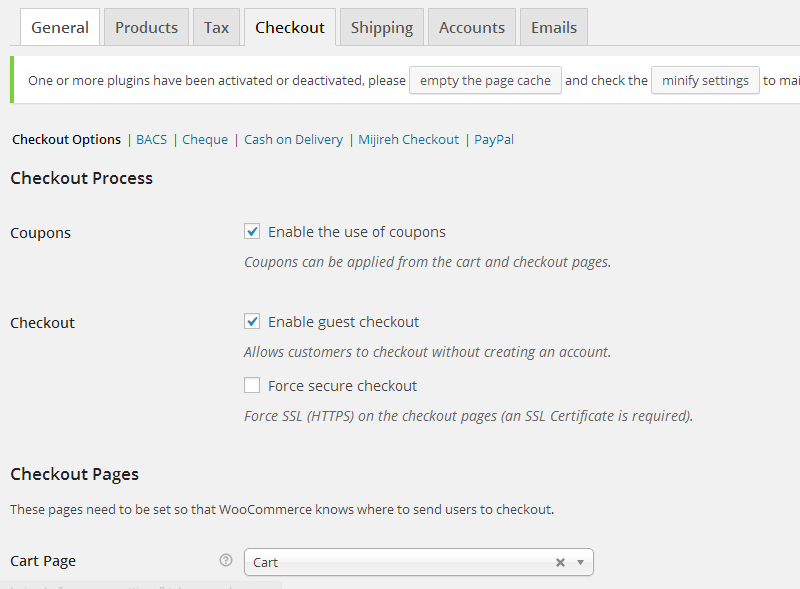
Checkout allows you to customize the checkout process: you can choose from five payment gateways, edit the pages, add a T&C page, and change URL appendages.
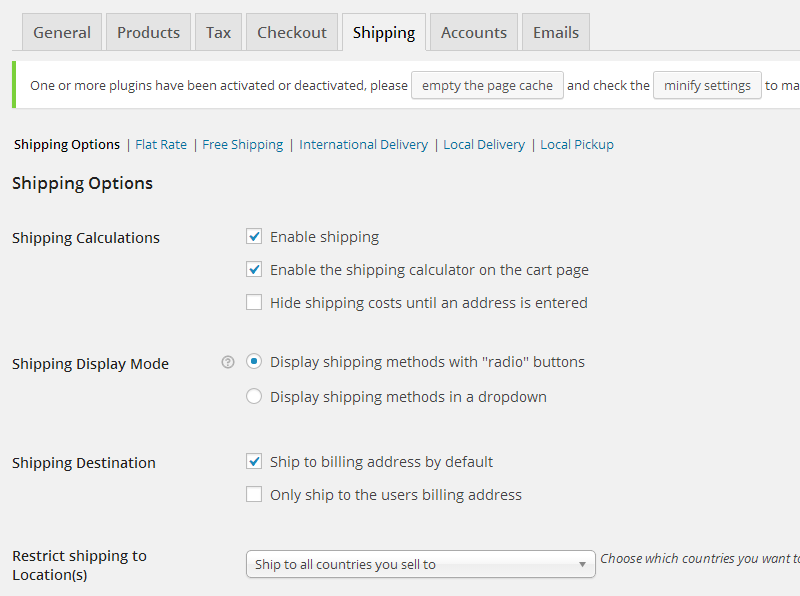
Shipping takes care of your shipping methods and pricing models. You can also enable/disable shipping store-wide, and edit various display options. Restricting your store availability only to specific countries is also possible.
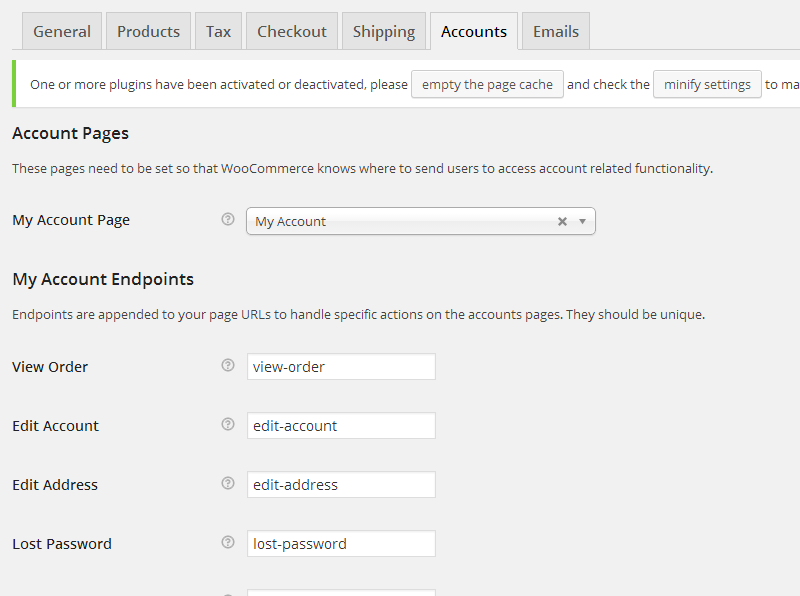
Account edits all front end account display and registration options.
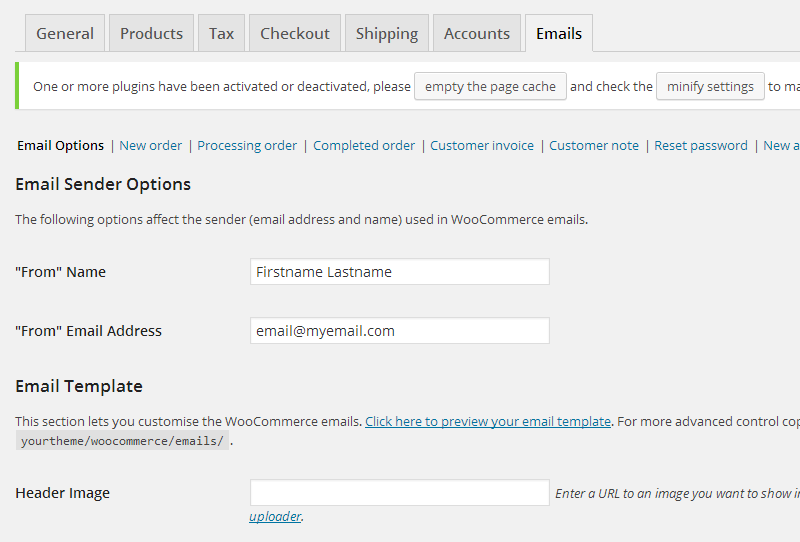
Lastly, in the Emails tab, you can customize all things customer support. Specifically, you can tailor all the sender options for WooCommerce-generated email, right down the the email background color.
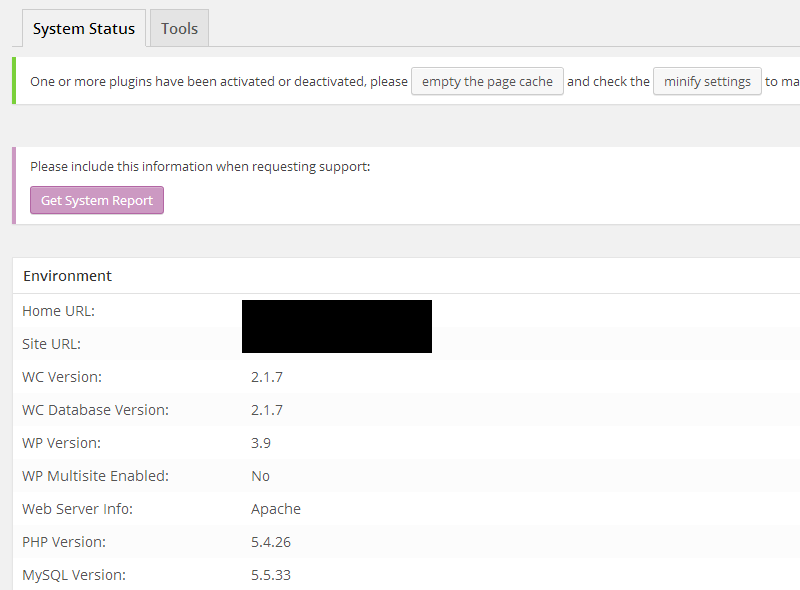
All your back end information — your WooCommerce/PHP/MySQL/etc. version, size limits, logging, and more — is found here. In the Tools tab on the same page , you can clear your website caches for multiple variables, install new options, and reset settings to the default.

One of the attributes that makes WordPress the most popular CMS on the planet is the community behind it. Thousands of themes and tens of thousands of plugins; nearly 100% of them are user-contributed. It’s pretty much the same thing with WooCommerce, although on a smaller scale.
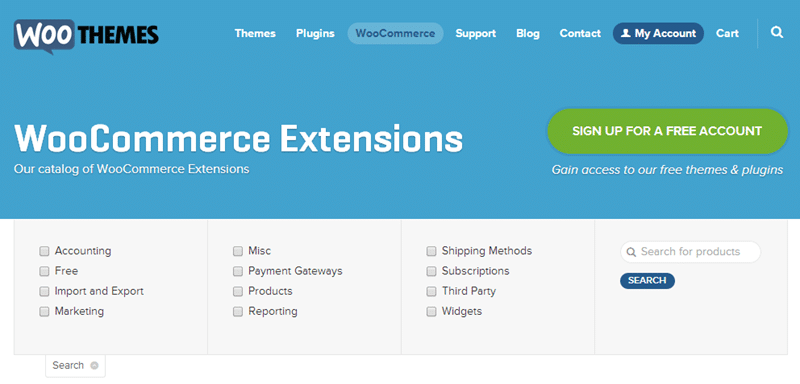
The plugin developers allow you to purchase native and third-party WooCommerce extensions from their Extensions store. Literally hundreds of various add-ons and WooCommerce-specific themes and styling options are available at the store.
In case you are looking for a super fast hosting solution for your store,
Here’s an extensive guide to setting up WooCommerce on your blog.
Installation
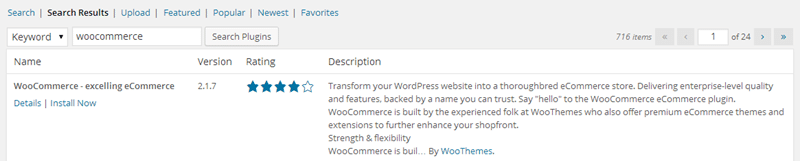
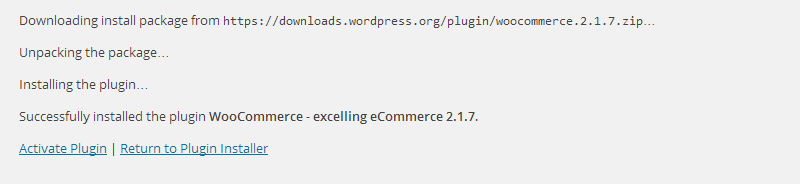
Navigate to WP Admin > Plugins > Add New, search for “woocommerce”, and install & activate the first result. 2.1.7 is currently the latest version of WooCommerce. Your first task after activating WooCommerce is to also install WooCommerce pages, as prompted by the new notification message sitting on the top of your dashboard.
Adding & Managing New Products
The first alteration you’ll notice is the addition of two new tabs to your dashboard’s side menu, named WooCommerce (your general settings area) and Products (your products settings area). To get started setting up your e-store, go to WP Admin > Products > Add Product to add your first product.Create a title and short description for the product. Here’s what just a title & description looks like in a live preview.
That done, scroll down below the post editor to reveal two new widgets on the post editing screen: product data and product short description.
Product Data
WP Admin > Products > Add NewIn the product data screen widget, you can select whether or not the product is virtual (the former option removes the Shipping data tab) and if it is digital. You can enter in an SKU (identification number) and the regular & sale price (sales can be time-sensitive) in the General tab.
If you’re selling digital products, then you also have to upload the file to be purchased, customize the download limit (leave it blank to mark it as unlimited), the download expiry (leave it blank to keep it available permanently), and the file type (standard/application/music). The file type you select affects the schema.org markup for the product.
Next, in the Inventory tab, you can customize options to manage your stock by entering in the quantity of the product, stock status (in/out of stock), and if you’d like to allow backorders. Additionally, you can mark the product as individually sold, meaning only one can be bought in a single order.
In the Linked Products tab, you can add upsells, cross-sells, and product grouping. Attributes allows you to enter in specific attributes of the product (e.g. reliable, never breaks down, etc.) that will be displayed under an Additional Information tab in the front end version of the product page. Finally, you can enter custom purchase notes, give the product a menu order, and enable/disable reviews in the Advanced tab.
Product Short Description
WP Admin > Products > Add NewWith the product short description screen widget, you can create a short tagline for the image that will be displayed under the product title.
After playing around with all of that, don’t forget to add tags, place it in a category, and include a product image/gallery. Here’s what some sample data looks like in a live preview.
Managing Products
WP Admin > Products > [various tabs]In the other pages under WP Admin > Products, you can view your products, categories, tags, shipping classes, attributes, and calendar. Each of these pages look like the standard WP Admin > Posts > Categories page, excepting the product view and calendar view (displayed below).
Managing WooCommerce
In the WooCommerce tab, you can explore various things about your digital store: you can view orders, coupons, and reports. You can also customize settings and add new extensions.Orders
WP Admin > WooCommerce > OrdersThis page displays a list of your current purchases and orders. If you sell digital products, there’s not much to do here other than see who bought what. But if you sell physical goods, here’s where you can organize what products you need to ship and what orders are being processed or put on hold.
Coupons
WP Admin > WooCommerce > Coupons [> Add New]WooCommerce has several powerful options for adding new coupons to your e-store. In the coupon editing screen, the coupon data screen widget allows you to customize the coupon discount and restrictions.
The General tab allows you to edit the basic coupon information: the type of coupon (cart discount, cart percentage discount, product discount, and product percentage discount), its value, free shipping options, coupon taxation, and its expiry date.
In Usage Restrictions you can set a minimum spend the customer has to make to validate the coupon. To restrict the use from use in conjunction with other coupons, check the box for Individual use only. If the coupon shouldn’t apply to items that are on sale, there’s an option for that, too. Here’s also where you select the products and product categories the coupon is applicable to. Lastly, you can even ban certain email addresses from coupon usage.
The final tab, Usage Limits, sets the usage limit per coupon or per customer.
The coupon management screen is below.
Reports
WP Admin > WooCommerce > ReportsWooCommerce also offers powerful built-in tracking. You can view charts and graphs of your sales, orders, and shipping costs over five different time periods. Each graph can be limited to the sales of a particular product, product category, or coupon. In the Customers tab, you can view your customer acquisition over the same five time periods. Lastly, you can also view your low in stock, out of stock, and most stocked products in the Stocks tab. All this data can be exported in a CSV sheet.
Settings
WP Admin > WooCommerce > SettingsHere’s where WooCommerce gets really impressive: in the Settings screen, you can customize pretty much every single aspect of your e-store. Everything from your thousands separator to the check out process to email options can be tailored to your satisfaction.
The General tab takes care of your basic information, including your currency, base & selling locations, and display options.
Your product data, including custom sorting, default displays, measuring systems, product thumbnail dimensions, download methods, and even Ajax/non-Ajax add to cart buttons is customized in the Products tab.
Taxation methods are modeled in the Taxes tab — if you wish, you can even disable taxation in your store.
Checkout allows you to customize the checkout process: you can choose from five payment gateways, edit the pages, add a T&C page, and change URL appendages.
Shipping takes care of your shipping methods and pricing models. You can also enable/disable shipping store-wide, and edit various display options. Restricting your store availability only to specific countries is also possible.
Account edits all front end account display and registration options.
Lastly, in the Emails tab, you can customize all things customer support. Specifically, you can tailor all the sender options for WooCommerce-generated email, right down the the email background color.
System Status
WP Admin > WooCommerce > System StatusAll your back end information — your WooCommerce/PHP/MySQL/etc. version, size limits, logging, and more — is found here. In the Tools tab on the same page , you can clear your website caches for multiple variables, install new options, and reset settings to the default.
Add-ons
WP Admin > WooCommerce > Add-onsOne of the attributes that makes WordPress the most popular CMS on the planet is the community behind it. Thousands of themes and tens of thousands of plugins; nearly 100% of them are user-contributed. It’s pretty much the same thing with WooCommerce, although on a smaller scale.
The plugin developers allow you to purchase native and third-party WooCommerce extensions from their Extensions store. Literally hundreds of various add-ons and WooCommerce-specific themes and styling options are available at the store.
Wrapping Up
WooCommerce truly is, beyond a shadow of a doubt, the best free ecommerce solution for WordPress. On the outside, the plugin has phenomenal stats, but it’s only when you dig deeper into the WooCommerce options and back end that the pure awesomeness is truly revealed.In case you are looking for a super fast hosting solution for your store,


0 Comments